
This documentation outlines the steps to integrate WooCommerce with your BookingHub plugin, allowing you to process BookingHub payments through WooCommerce. When your users reach the summary step of their booking form, they will be seamlessly redirected to the WooCommerce cart page to complete their payment.
Step-by-Step Integration Guide:
1. Install and Activate the WooCommerce Plugin
Before you begin, ensure that the WooCommerce plugin is installed and activated on your WordPress website.
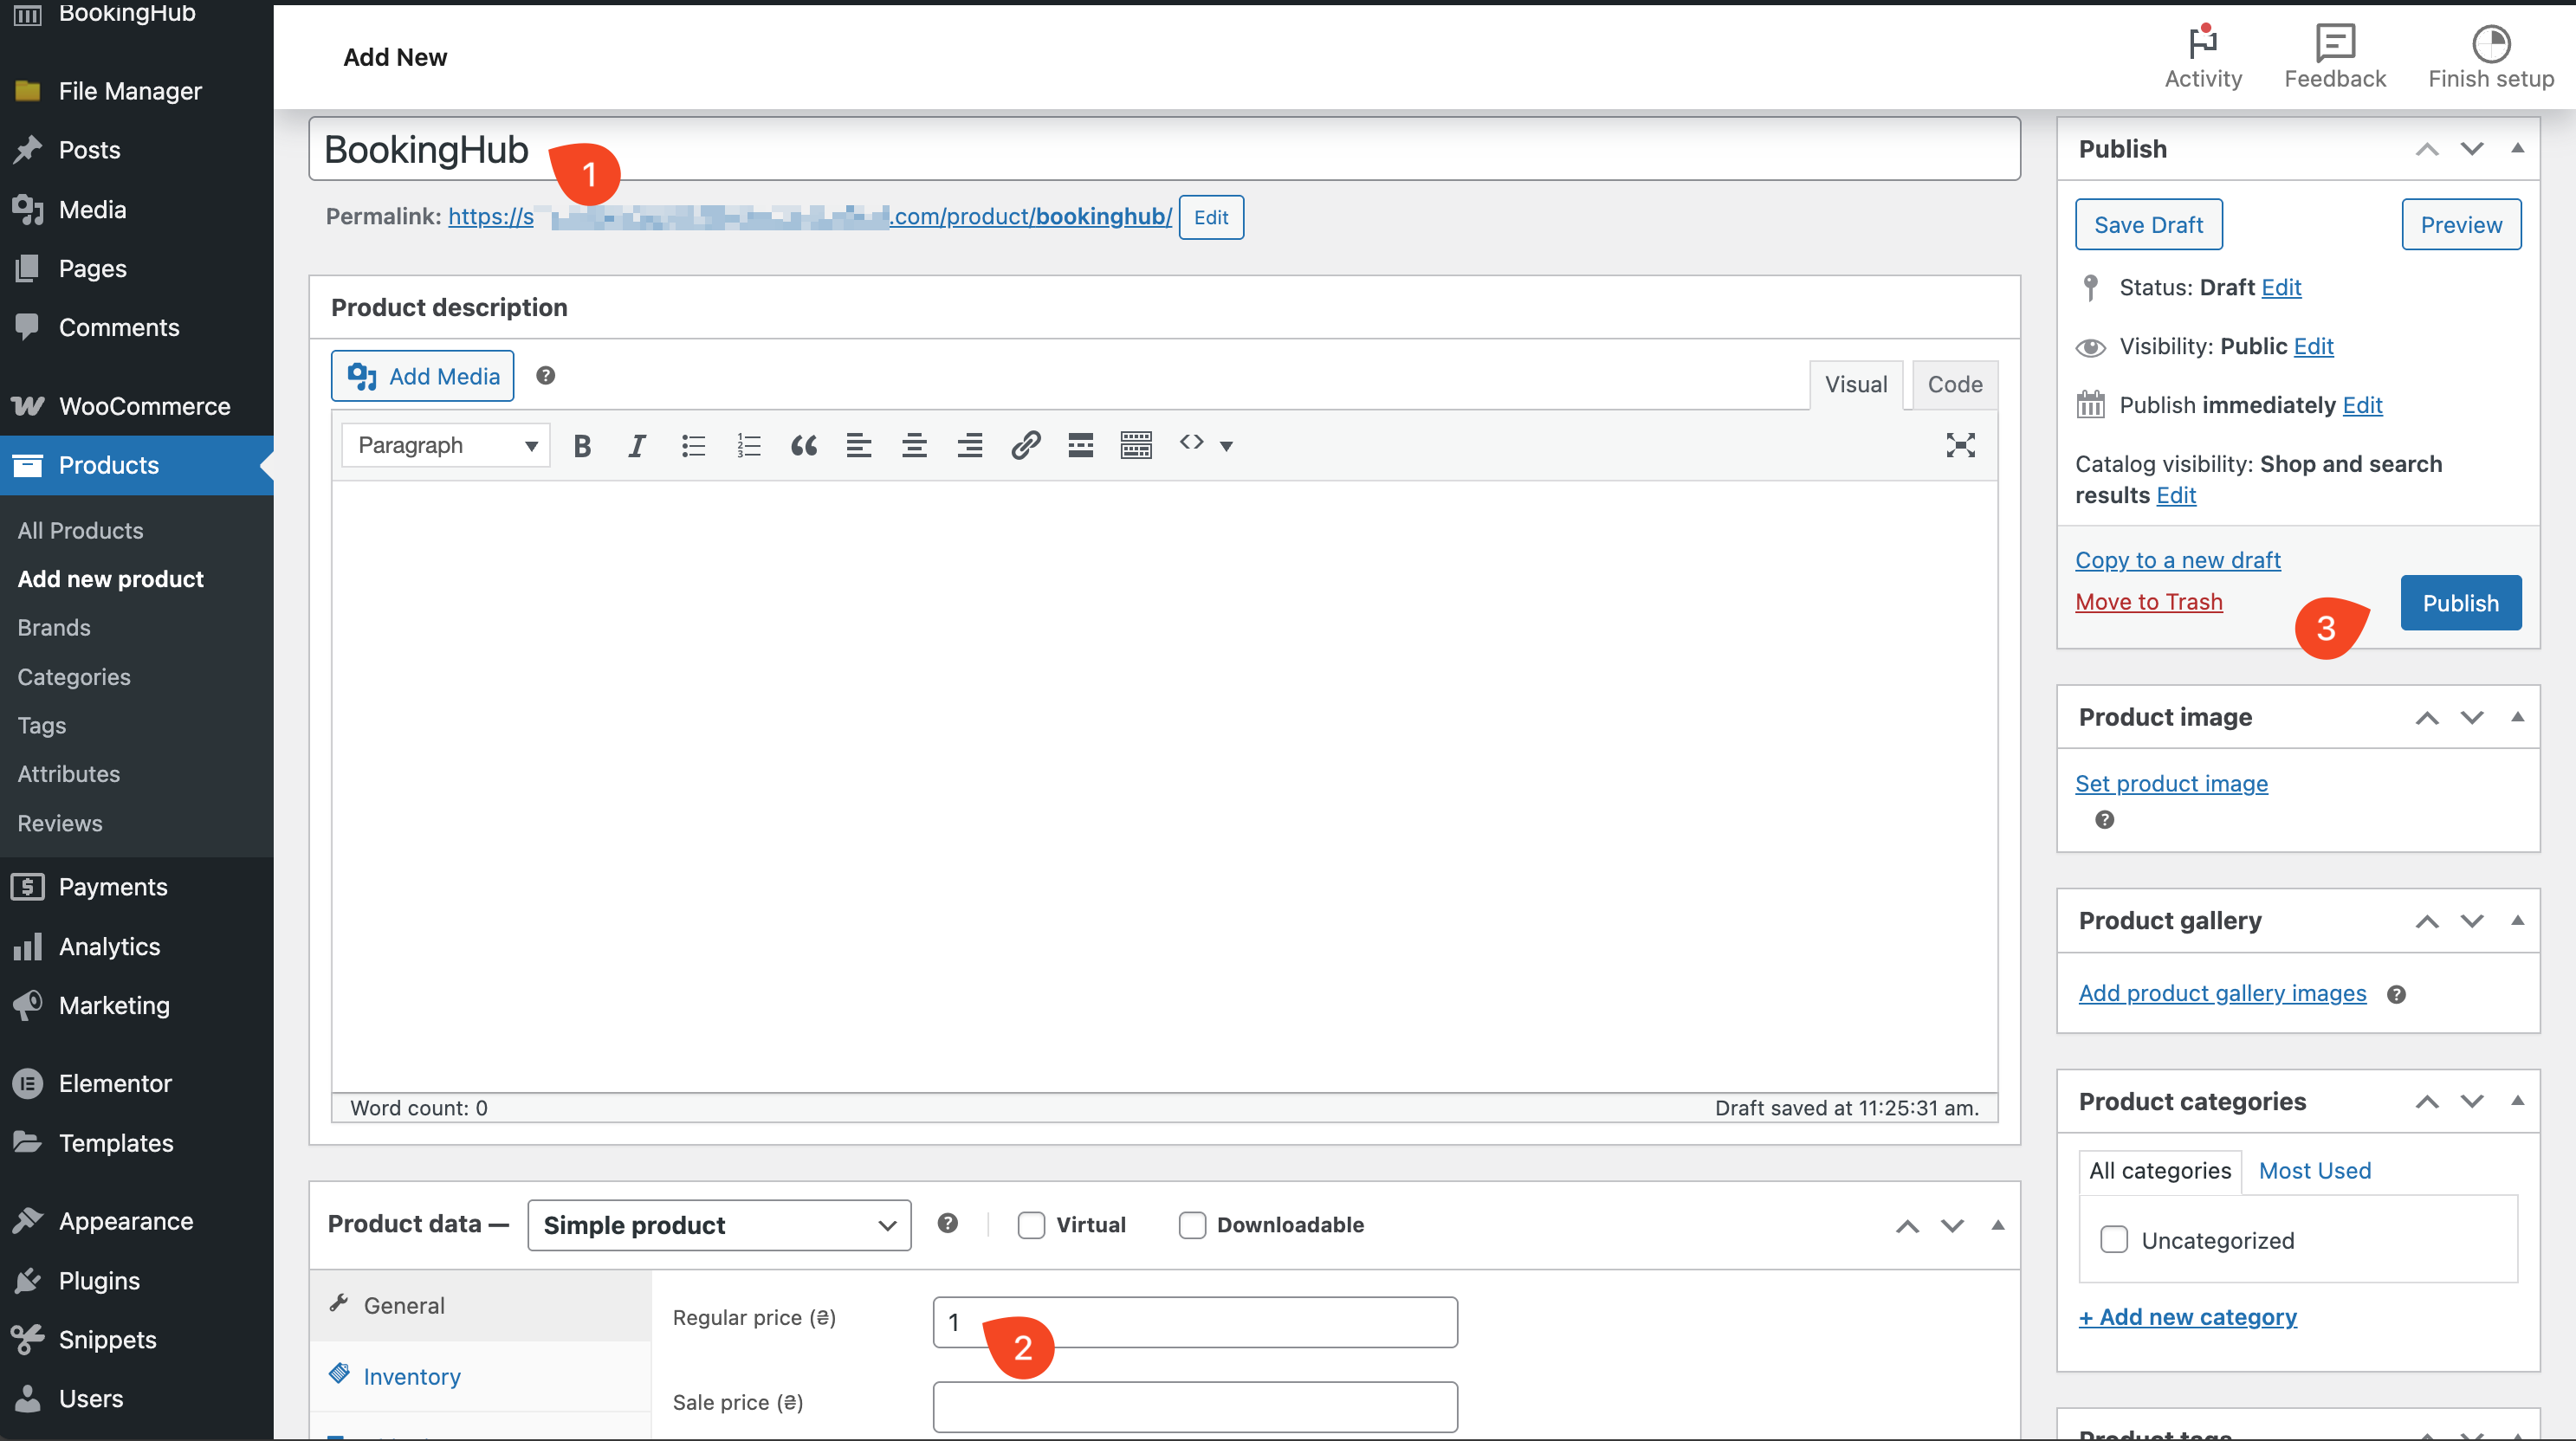
2. Create a Placeholder Product in WooCommerce
BookingHub dynamically adjusts product details, so you’ll start by creating a simple placeholder product in WooCommerce.
From your WordPress dashboard, navigate to WooCommerce > Products.
Click on “Add New”.
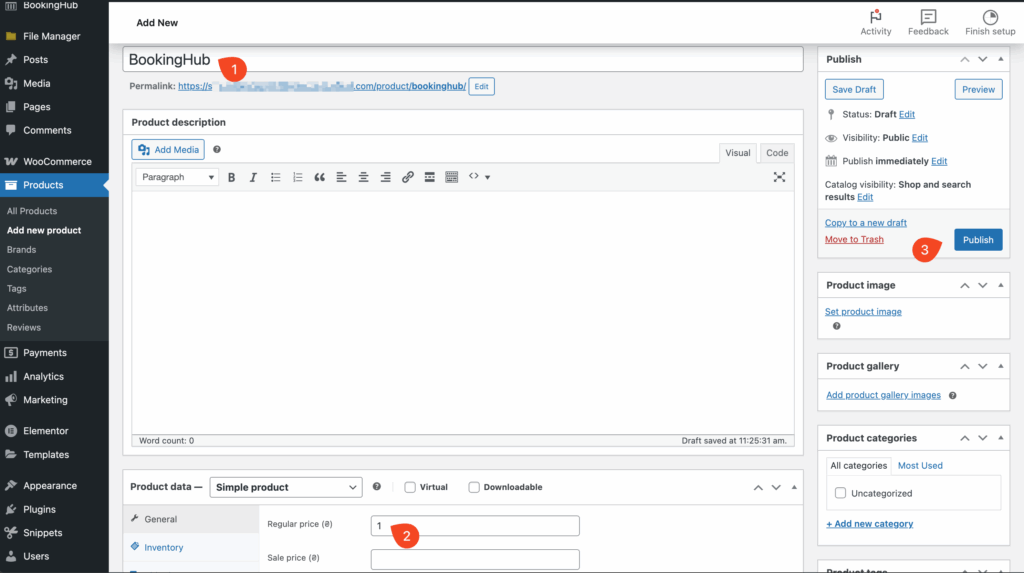
Give the product a temporary name (e.g., “BookingHub Service”).
Set a temporary regular price for the product.
Click the “Publish” button to make the product live.
3. Enable WooCommerce Integration in BookingHub Settings
Now, activate the WooCommerce integration within your BookingHub settings.
Go to BookingHub Settings > WooCommerce.
Locate the “Enable WooCommerce Payment” toggle and switch it to “ON”.
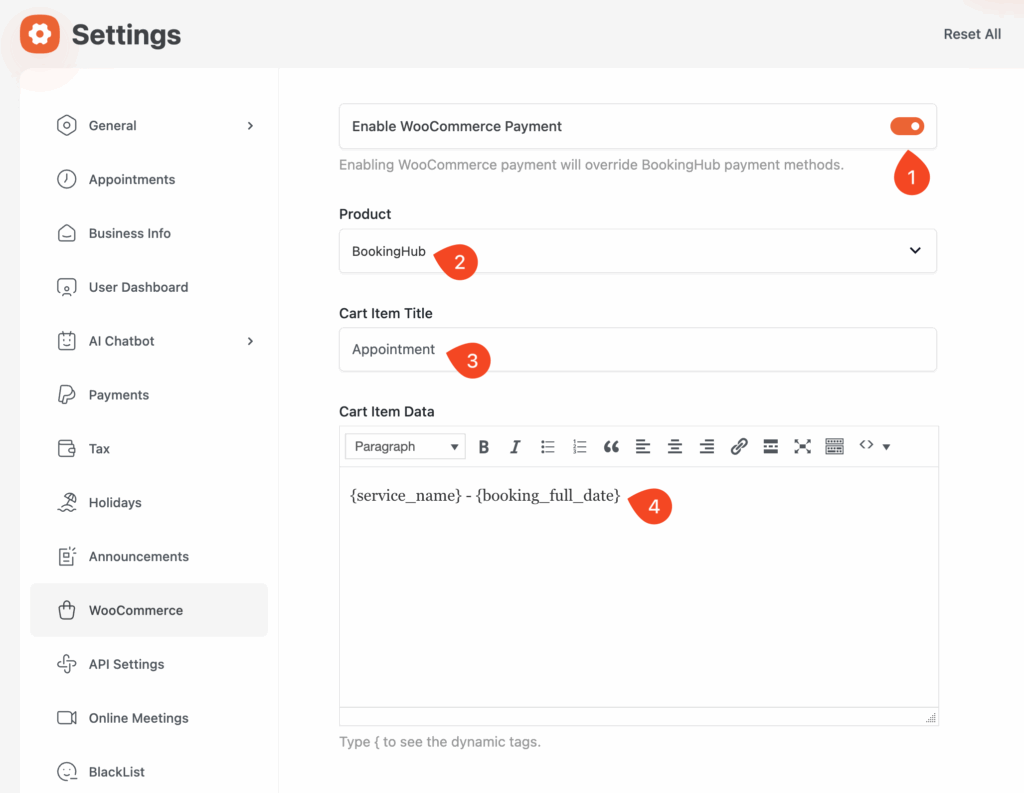
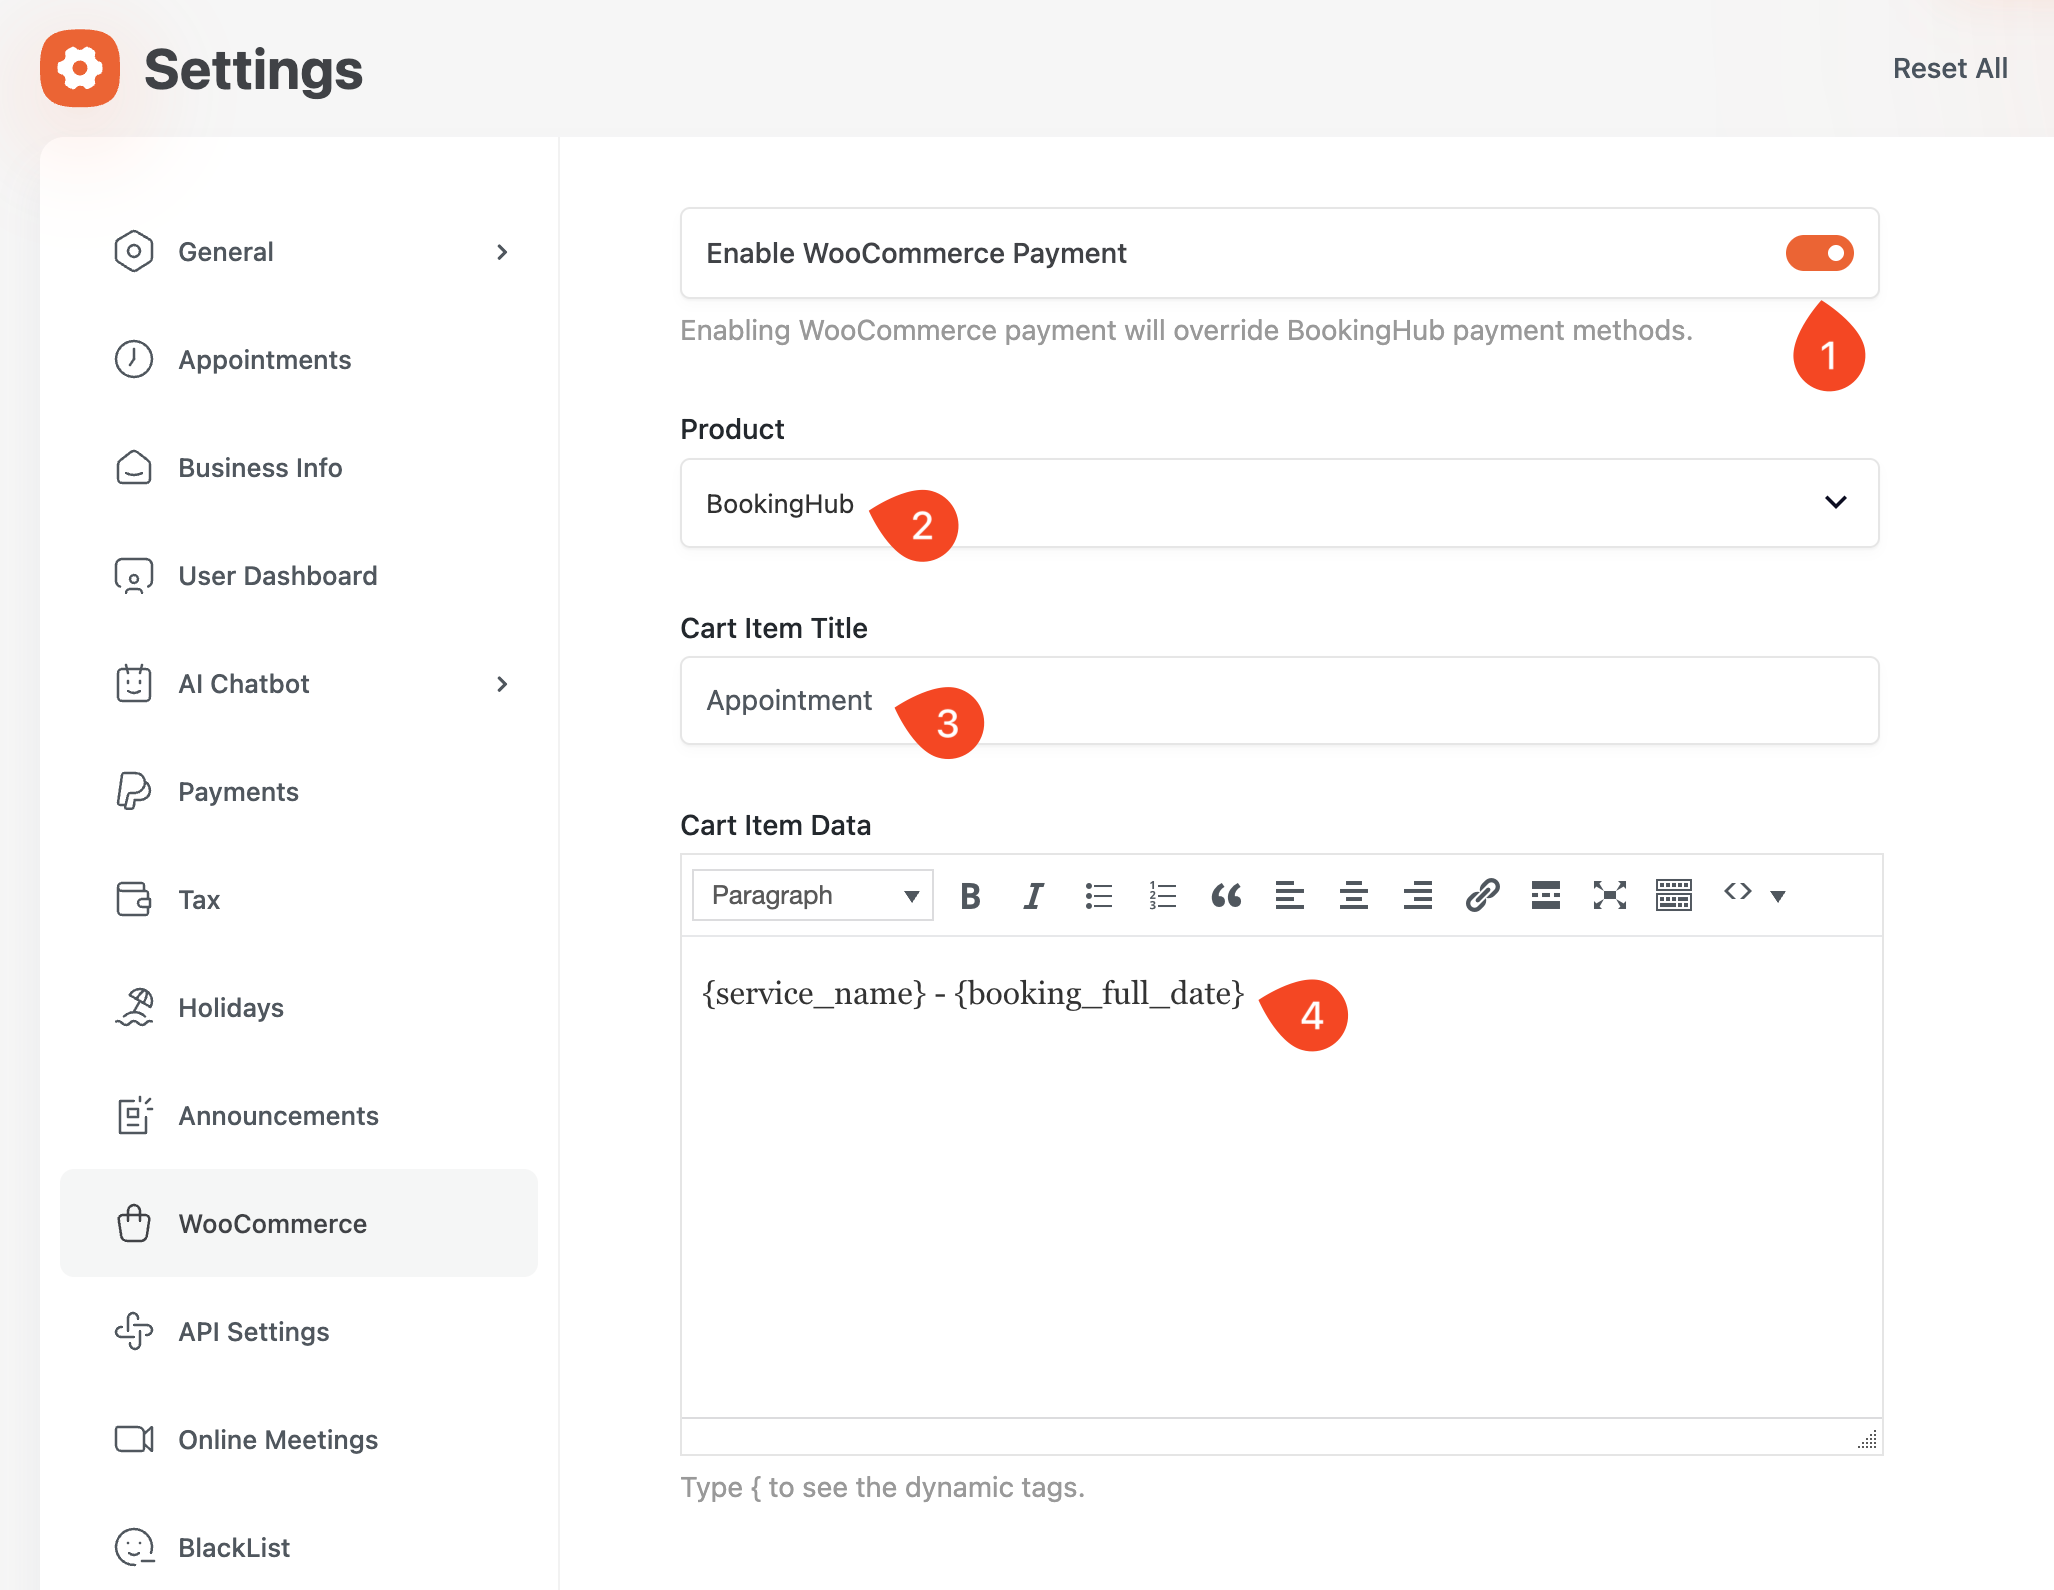
4. Select Your WooCommerce Placeholder Product
Within the BookingHub WooCommerce settings, find the “Product” dropdown menu.
Select the placeholder product you created in Step 2.
5. Configure Cart Item Title
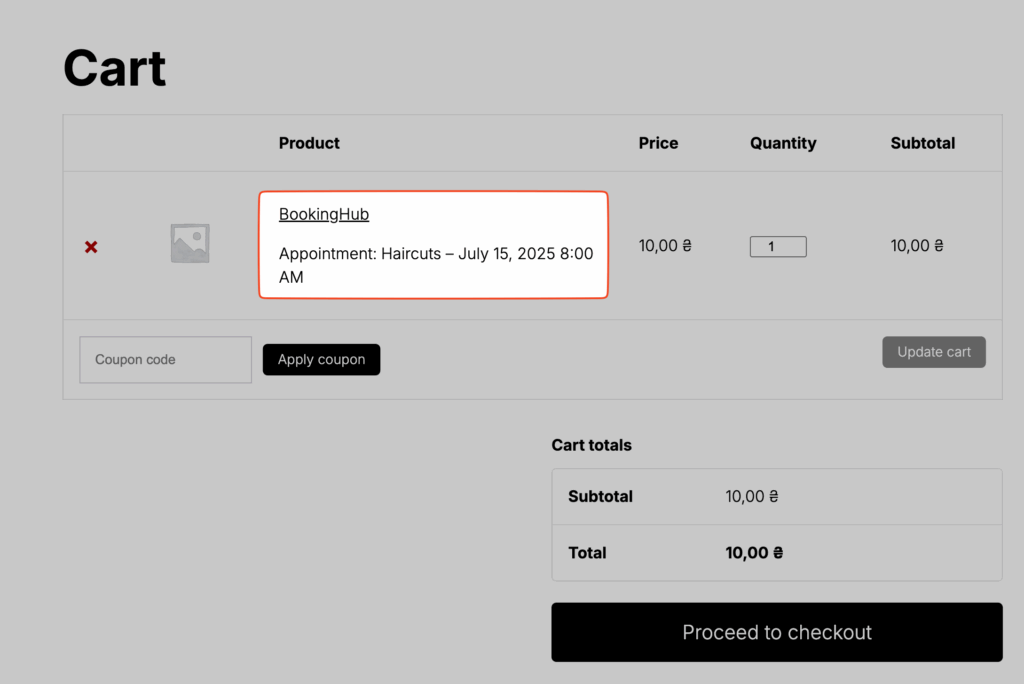
In the “Cart Item Title” field, enter a concise title. This will appear at the beginning of the booking’s title in the WooCommerce cart.
6. Define Cart Item Data (Supports Dynamic Tags)
Use the “Cart Item Data” field to add detailed information that will be displayed beneath the booking in the WooCommerce cart.
This field supports dynamic tags, allowing you to automatically include booking-specific details (e.g.,
{service_name},{booking_full_date}).
7. Save Your Changes
After configuring all the settings, click the “Save Changes” button to apply your modifications.
8. Test the Integration
To confirm everything is working correctly, create a new booking through your BookingHub system.
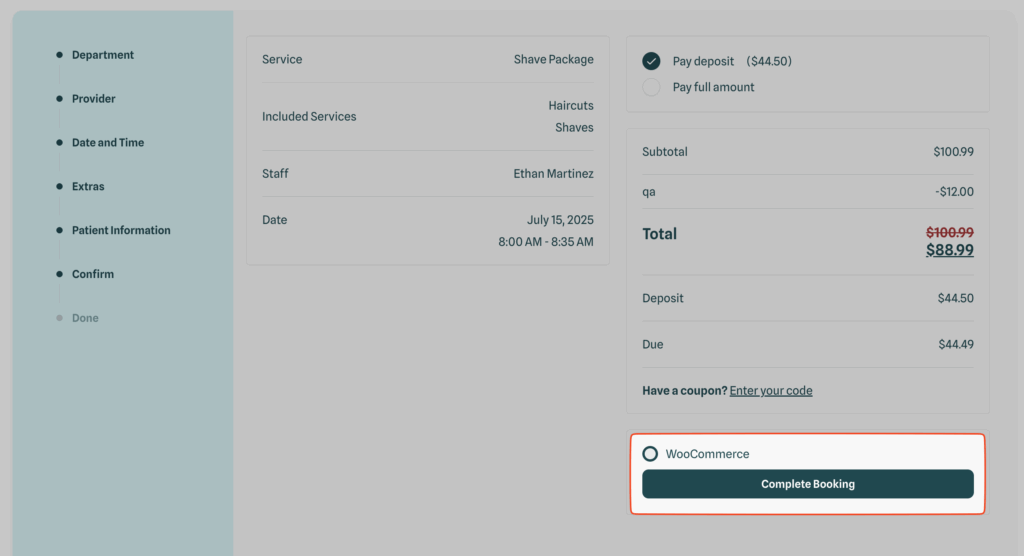
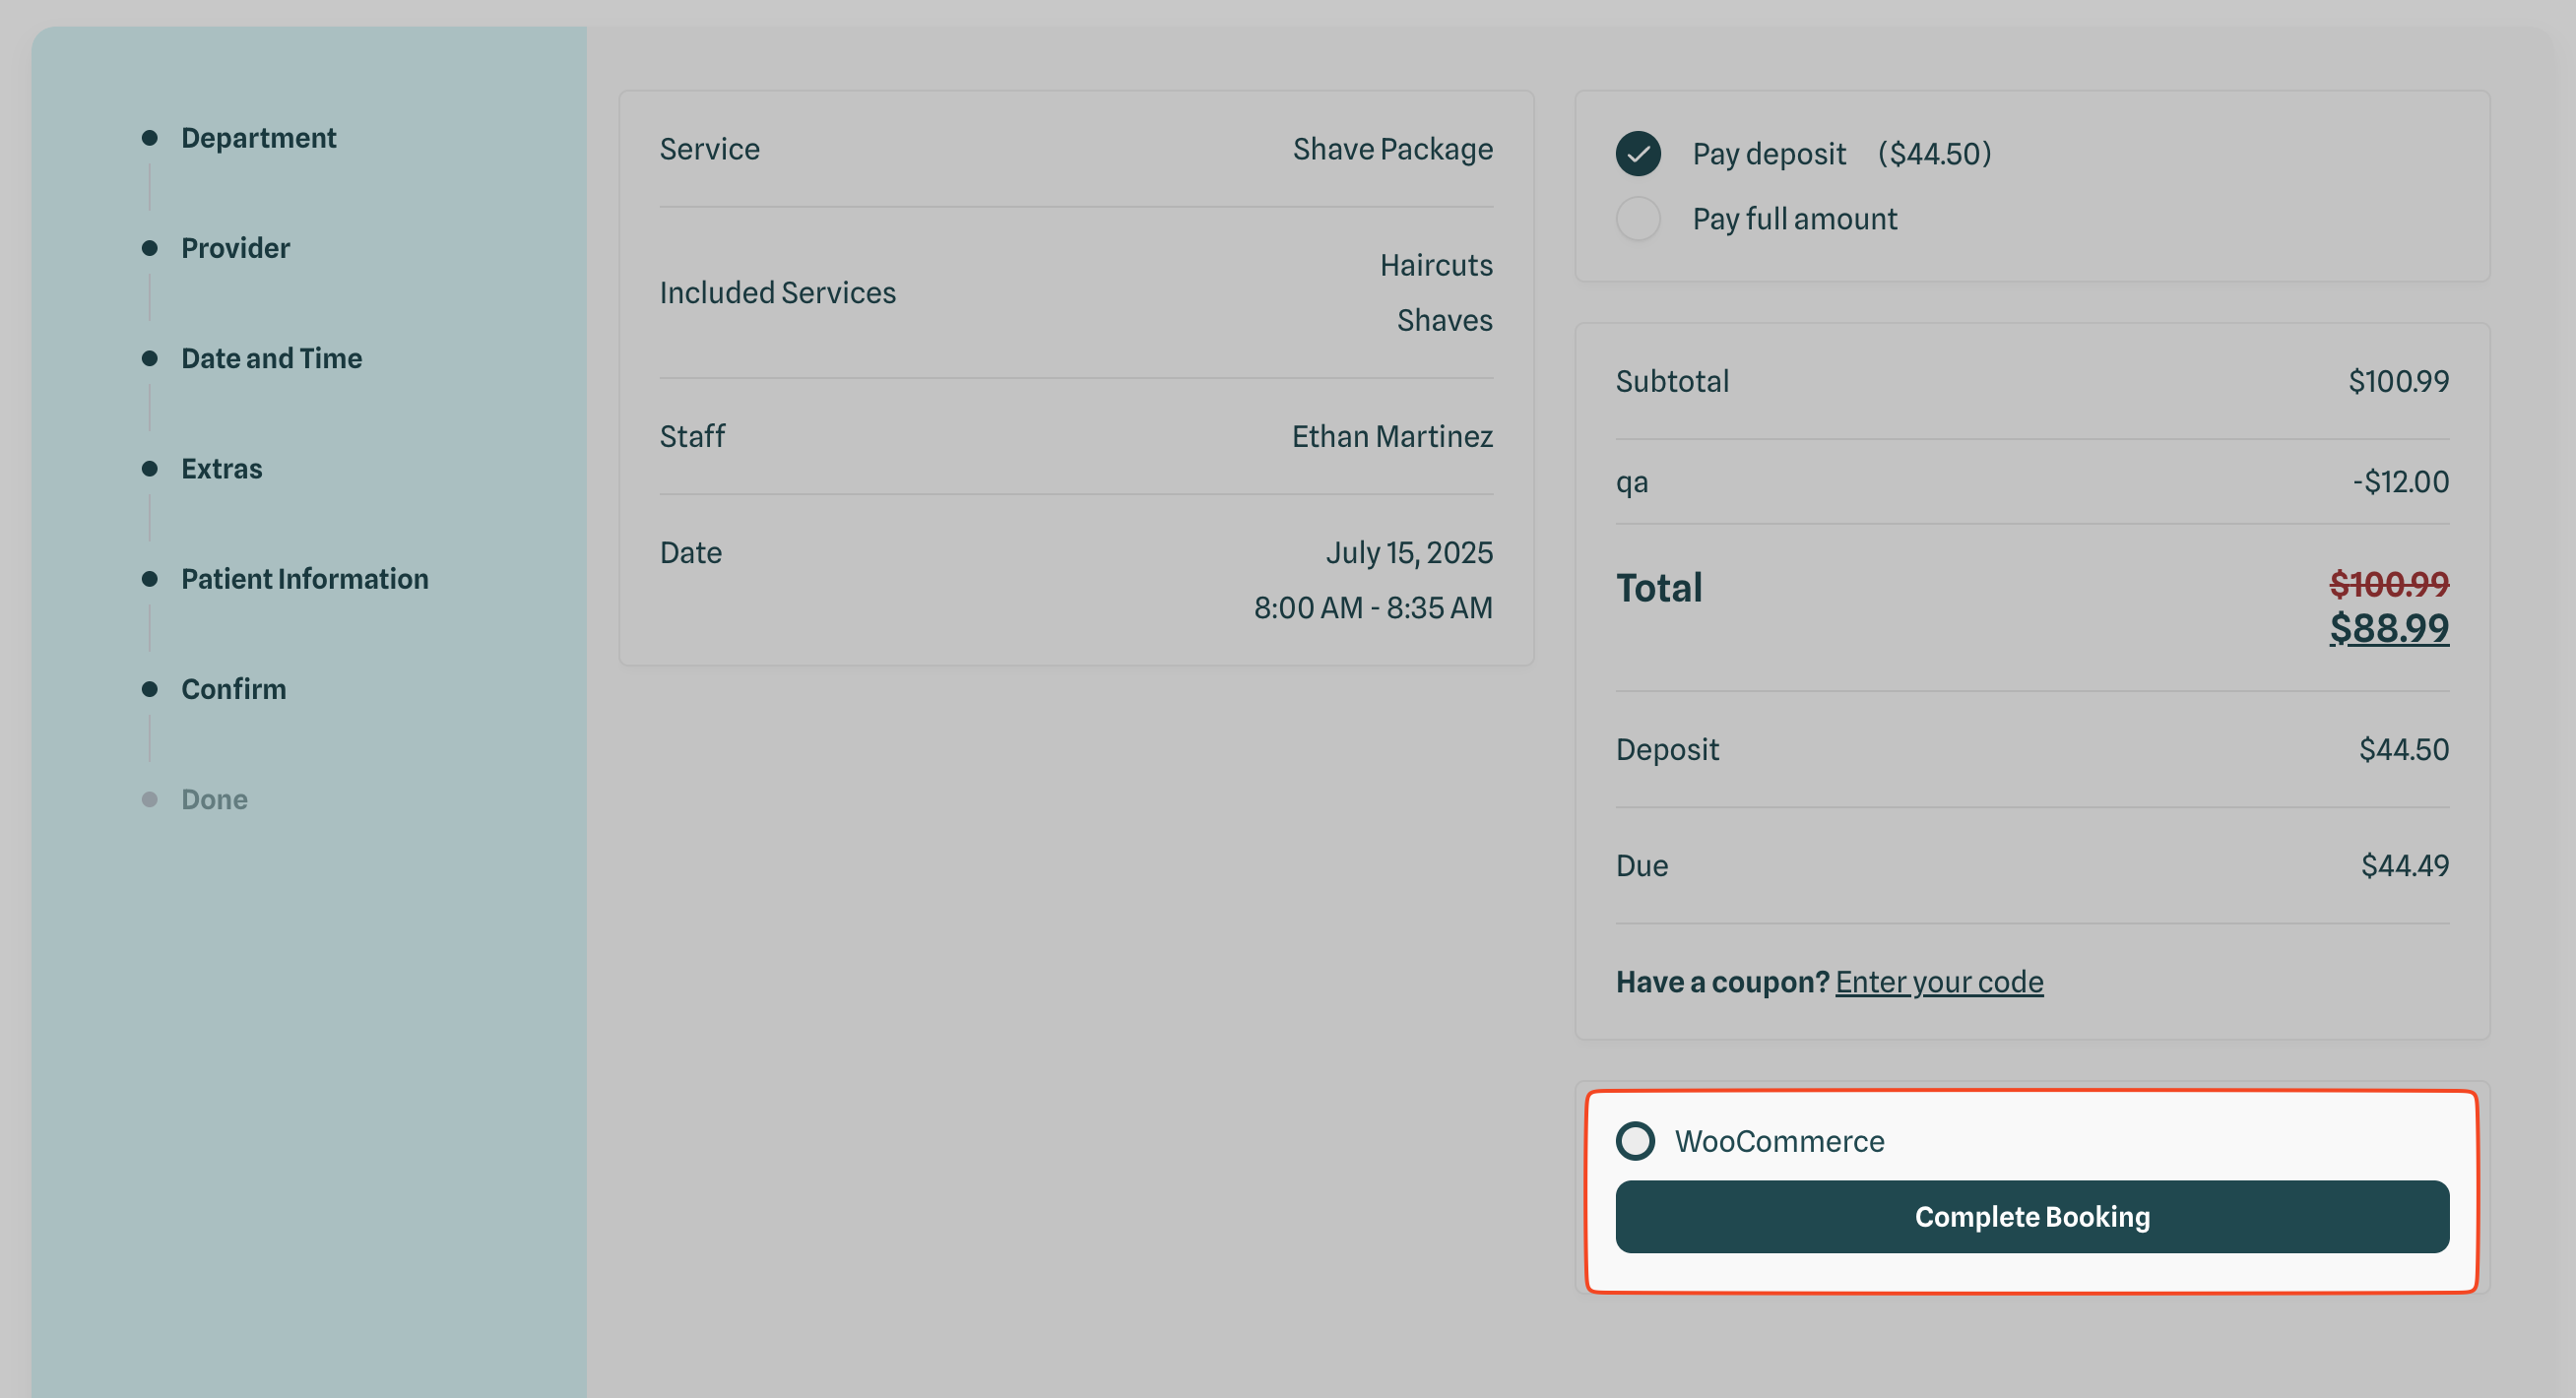
Upon reaching the summary step of your booking form, you should be automatically redirected to the WooCommerce cart page to proceed with payment.

By following these steps, you will successfully integrate WooCommerce with BookingHub, providing a streamlined payment experience for your users.